
Tesla Car Configurator - Interactive HTML Email Experiment
My personal challenge to build a complex & real world interactive email.
Disclaimer: This project was in no way affiliated with Tesla

🎮 Functionality
The interactive tool is made up of two parts:
-
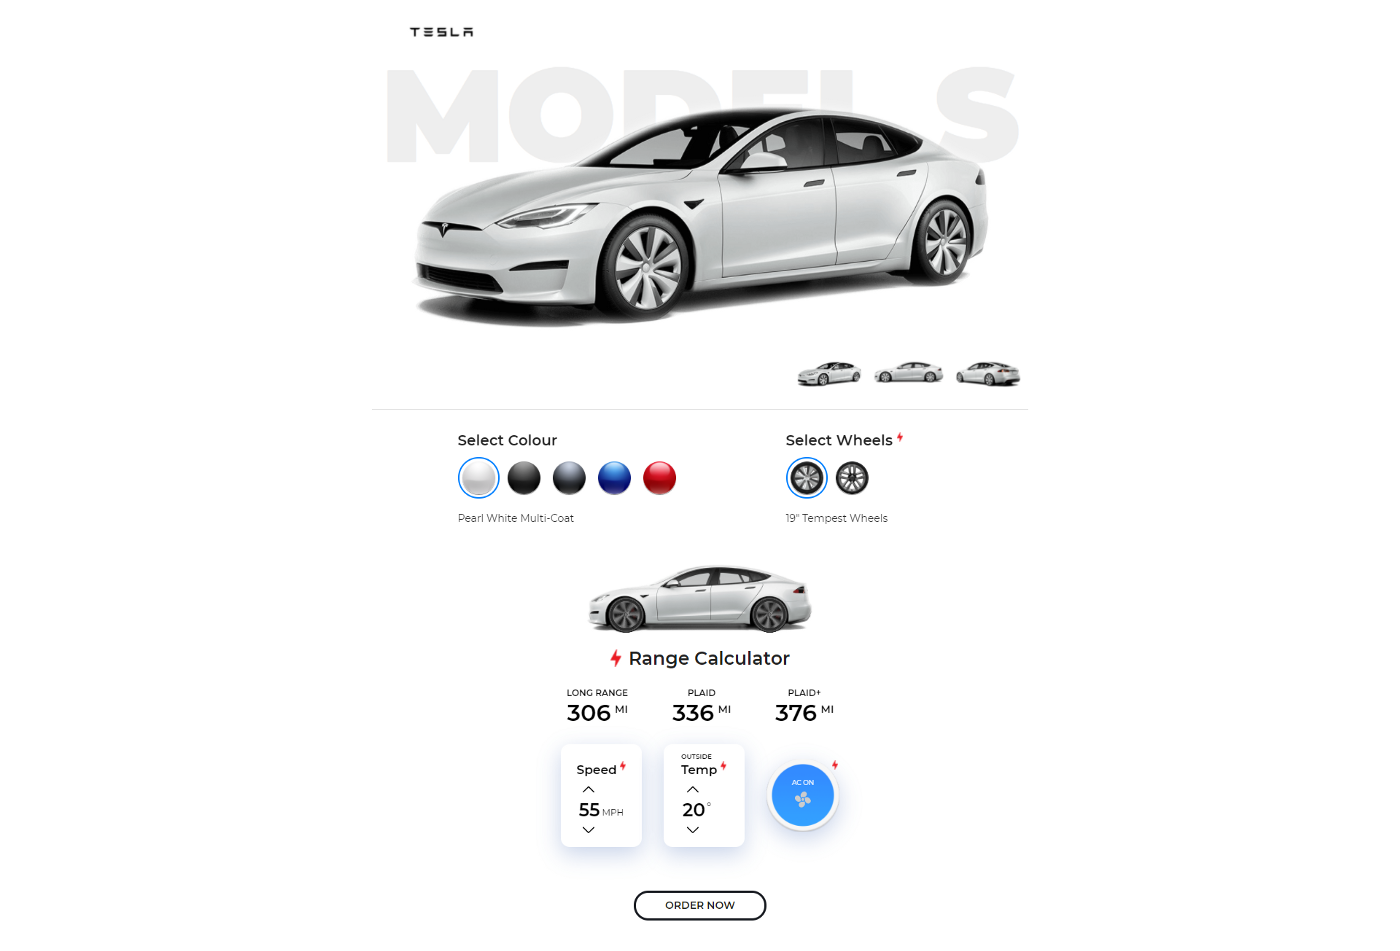
Car configurator — Includes a slideshow of three different angles of the car, colour selection and wheel size & design selection. Both of the colour and wheel options will update the slideshow so you can preview your specific Model S.
-
Range calculator — Includes the three model options in the Model S family and their ‘calculated' ranges with the three default settings (speed, outside temperature & AC or Heat on/off).
The three settings will each have a determining factor on the range of each model option.
💡 The idea
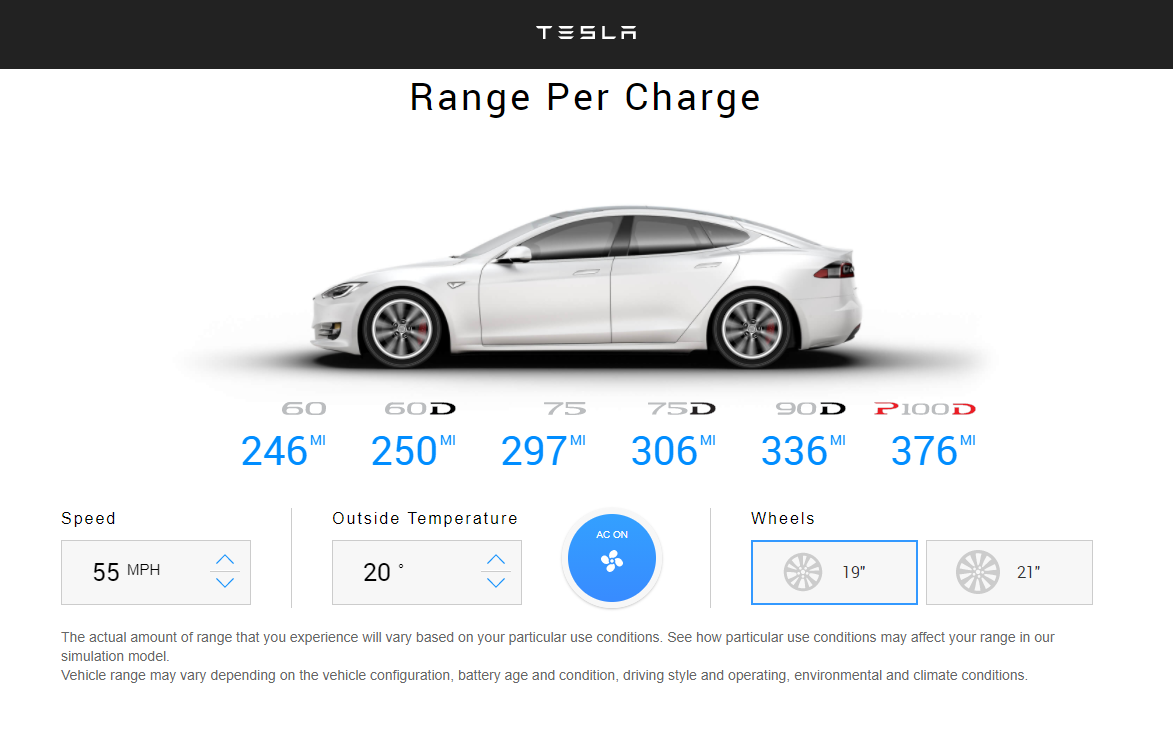
The idea for this email was sparked at least four or five years ago after seeing the original range calculator on the Tesla website (now removed), being recreated in React & Angular.
The idea only included the battery range calculator at the time. The configurator was a later addition.
It was really interesting to see how these developers went about recreating the tool in the chosen frameworks and it got me thinking… How would this translate to email?
-
We obviously can't use a matrix of range values in JS like the JS framework examples are using.
-
How will the up/down arrows & AC/Heat button change the three range values
-
Is there any way to connect the wheels to the current speed to add a little more interactivity and a differentiating factor to the JS examples. The original and rebuilds simply had the wheels rotating at one speed.
Todd Motto, the creator of the Angular tutorial thankfully supplied all of the assets including the car, wheels with motion blur added, AC/Heat button and the Model S option logos.
So I went ahead and started the base build, laying out each section and leaving the nitty gritty testing for updating the range calculations for later. Work was completed when I had some down time. I was juggling a lot, at work and in my personal life so work on this was infrequent.
Fast forward a few months and we were planning our big move from New Zealand to the UK. Unfortunately this resulted in this build collecting digital dust while I got myself settled into Scottish life and a new job.
Fast forward three and a half years to early 2021 and while cleaning up my personal files I found this little gem.
🔨 Build — Sourcing assets
At the point of stopping work on this almost four years ago, I had tested out CSS counters to control the range calculations. This was in an effort to avoid Punched Card Coding (PCC) i.e. multiple inputs and labels being shown/hidden to display specific content. The larger and more complex the functionality, the more inputs and complex CSS selector chaining required.
In the end it just wasn't the way to go and so I reverted to the trusted PCC method.
As well as blowing off the dust of this old project, Tesla had worked on an update to the Model S, introducing the 2021 Model S including cosmetic updates which were a massive issue for my build. My imagery, assets grabbed from Todd Motto's tutorial and model options would be out of date.
Further to that, the design was pretty dated. Definitely time for a refresh!
So I scoured the internet for high-res imagery, even resorting to guessing URLs for images on the Tesla website.
It took a while but I ended up finding high-res images of all colour & wheels variants of the new Model S, including an updated side profile & wheels for the range calculator animation.
Thinking modern day email development, I also then needed to cut all of these out so I could optimise for dark mode.
Hours of cutting out and refining and I finally had some transparent PNGs to work with.
Now the cut outs aren't that great because of the way the final images were exported, so I ended up heavily using the feather on the edges of all images.
I'm not completely happy with the dark mode view because of the white halo around the images, but ultimately I just need to remember if this were in fact a real world Tesla commissioned project, they would easily be able to provide me with clear cut transparent PNGs, so my half baked solution will suffice for now.
🔨 Build — Design
Right, first off — I am not a designer! I can scrape through with small design tweaks but I'm not that creative with layouts etc. BUT, I'm really happy with the end result.
I did some design research on Dribbble and ended up amalgamating a few ideas to give me the configurator design.
Looks quite polished in light mode!

🔨 Build — Execution
Hero & slideshow
The hero section which includes the “MODEL S” title + slideshow are layered with the title being absolutely positioned. No faux absolute position setups here, just a simple CSS declaration on the title div.
The reason I didn't go with the faux absolute position method (Mark Robbins / Steven Sayo) is that this email will generally only really work with the methods included in Apple Mail (MacOS & iOS) and Outlook Office 365 (MacOS) which all support absolute positioning and all of the other methods used in this email for that matter.
The slideshow is essentially like a tabbed section.
Hide all main content areas (side and rear profile views) on load, apart from the default which in this case was the front angle image.
The thumbs are radio inputs, so only one can be selected at a time.
On click, a radio button is selected and the CSS selector will switch which larger preview is shown. Easy!
Configurator
This is where things get a little complicated.
I've now added a colour selector and a wheel size & design selector.
Easy in functionality, again using radio inputs so only one can be a selected at a time but I've tied this into the slideshow which adds so much complexity into the CSS required to show/hide not only the correct colour but also the correct car angle depending on where the user stopped clicking through the thumbs.
On top of that, the thumbnails also update to reflect the colour and wheel options.
Oh, I didn't mention this also ties into the battery range calculator car with the spinning wheels below the configurator.

I'm not going to go into detail on how this all ties together as there is a whole lot to go through!
Feel free to view the external stylesheet that holds all of the interactive CSS.
It's mega and complicated but it is essentially the brains of the operation.
Battery Range Calculator
By now you're probably exhausted. So was I.
But we still have half of the build left to go.
My first task was to find out the different speed and outside temperature options included in the original tool.
Easy, I just copied what was included in the original tool.
Speed range: 45 / 50 / 55 (default) / 60 / 65 / 70
Outside temperature range: -10 / 0 / 10 / 20 (default) / 30 / 40
Oh wait, there's more. We also have an AC/Heat button which is enabled by default but also changes between AC when the outside temperature is above 10° and Heat when the outside temperature is below 20°
So for the speed and outside temperatures to work with the up/down arrows, I decided to go with the psuedo selector :before. This way I'm not hiding/showing a div or and image to simply show a number.
For example — We increase the speed to 60, the corresponding CSS is:
#speed-60-up:checked ~ .showroom .speed-counter:before { content: '60'; }Same for increasing the outside temperature to 30°:
#temp-30-up:checked ~ .showroom .temp-counter:before { content: '30'; }Now for the AC/Heat button background image switch, if we've set an outside temperature of 20° or above:
#temp-20-up:checked ~ #temp-control:checked ~ .showroom .temp-control-bg,
#temp-30-up:checked ~ #temp-control:checked ~ .showroom .temp-control-bg,
#temp-40-up:checked ~ #temp-control:checked ~ .showroom .temp-control-bg,
#temp-20-down:checked ~ #temp-control:checked ~ .showroom .temp-control-bg,
#temp-30-down:checked ~ #temp-control:checked ~ .showroom .temp-control-bg { background-image: url(images/temp-control-ac.png)!important; }
10° or below:
#temp-10-up:checked ~ #temp-control:checked ~ .showroom .temp-control-bg,
#temp-0-up:checked ~ #temp-control:checked ~ .showroom .temp-control-bg,
#temp-10-down:checked ~ #temp-control:checked ~ .showroom .temp-control-bg,
#temp-0-down:checked ~ #temp-control:checked ~ .showroom .temp-control-bg,
#temp--10-down:checked ~ #temp-control:checked ~ .showroom .temp-control-bg { background-image: url(images/temp-control-heat.png)!important; }
And finally I tied the wheel turning animation to the speed figure. So now any time the speed is increased/decreased, the CSS animation will also increase/decrease. With the default 55mph:
#speed-55-up:checked ~ .showroom .wheel,
#speed-55-down:checked ~ .showroom .wheel { -webkit-animation: infinite-spinning 80ms steps(4) infinite reverse!important; animation: infinite-spinning 80ms steps(4) infinite reverse!important; }
Right that's the settings panels out of the way. The values switch out as expected but now how do we tie those into the range values???
Again we can utilise our trusty pseudo selector :before, again.
However, the CSS chaining is waaaaay more complicated here.
- With the updated model, the range calculations would no doubt be different from the original Model S options. What are they and where do I get them?
- Even if they were the same, would I have to go through every variation in the calculator to find out all of the figures.
- Could I just make up some figures to save me time but also to avoid using old figures?
I ended up doing some digging and found that the Angular tutorial had recorded all of this information for me in this amazingly detailed file on Github.
They had the ranges corresponding to the outside temperatures, grouped by speed, then by whether the AC/Heat was on/off, then by wheel size and then by model type.
I couldn't even dream of being that detailed with my matrix, but it's exactly what I needed.
The original Model S had a lot more model types:
60 / 60D / 75 / 75D / 90D / P100D.
Whereas the 2021 model only had (at the time of build):
Long Range / Plaid / Plaid+.
This reduced a lot of manual documentation. THANKFULLY!
But I still had a lot of work to set up the CSS selector chain to show the correct range value for each model.
Here is the CSS for a speed of 55mph, outside temp of 20°, AC on and the 19" wheel option:
Long Range:
#speed-55-down:checked ~ #temp-20-down:checked ~ #temp-control:checked ~ #wheel-19:checked ~ .showroom .model-long-range:after,
#speed-55-down:checked ~ #temp-20-up:checked ~ #temp-control:checked ~ #wheel-19:checked ~ .showroom .model-long-range:after,
#speed-55-up:checked ~ #temp-20-down:checked ~ #temp-control:checked ~ #wheel-19:checked ~ .showroom .model-long-range:after,
#speed-55-up:checked ~ #temp-20-up:checked ~ #temp-control:checked ~ #wheel-19:checked ~ .showroom .model-long-range:after { content: '306'; }

Plaid:
#speed-55-down:checked ~ #temp-20-down:checked ~ #temp-control:checked ~ #wheel-19:checked ~ .showroom .model-plaid:after,
#speed-55-down:checked ~ #temp-20-up:checked ~ #temp-control:checked ~ #wheel-19:checked ~ .showroom .model-plaid:after,
#speed-55-up:checked ~ #temp-20-down:checked ~ #temp-control:checked ~ #wheel-19:checked ~ .showroom .model-plaid:after,
#speed-55-up:checked ~ #temp-20-up:checked ~ #temp-control:checked ~ #wheel-19:checked ~ .showroom .model-plaid:after { content: '336'; }

Plaid+:
#speed-55-down:checked ~ #temp-20-down:checked ~ #temp-control:checked ~ #wheel-19:checked ~ .showroom .model-plaid-plus:after,
#speed-55-down:checked ~ #temp-20-up:checked ~ #temp-control:checked ~ #wheel-19:checked ~ .showroom .model-plaid-plus:after,
#speed-55-up:checked ~ #temp-20-down:checked ~ #temp-control:checked ~ #wheel-19:checked ~ .showroom .model-plaid-plus:after,
#speed-55-up:checked ~ #temp-20-up:checked ~ #temp-control:checked ~ #wheel-19:checked ~ .showroom .model-plaid-plus:after { content: '376'; }
That is a fair amount of CSS to spit out one figure for each model.
Now imagine that for each variable for speed, outside temp and AC/Heat on/off.
An upside of this method of setup is the flexibility to amend those figures going forward, when using an external stylesheet.
💀 Fallback
This specific execution doesn't have amazing support, as noted earlier on. It pretty much only works in Apple Mail (desktop & mobile) & Outlook Office 365 (MacOS). But it still shows what is possible.
😭 Conclusion
In an ideal world, the ‘Order now' button would take your configuration and take you to the checkout page for the Model S.
Also you may wonder why this would be useful?
Imagine the Model S was released in allocation pools and this email were part of an automated journey and was fired out when a new allocation pool opened up. Customers who showed interest could choose their configuration, double check the mileage they would get with the model of choice and then hit ‘Order now' and the system can take them through to checkout instantly.
I reckon that would make customers over the moon if that meant they could effectively jump the queue.
Technical note
Now by no means am I saying the methods I've used in this are ideal or the best way to do it. I'm already wondering if there is a cleaner way to select the numerous variables to spit out a result.
I mean, could I have used better CSS selectors to reduce some of the weight. Maybe.
Could I have built this with better support to allow more people to view the email, maybe.
My next challenge
I've already got my eye on the next challenge, which will be building the McLaren car configurator using AMP.
I'm potentially getting in way over my head but I need to learn AMP, I want to build even more complex interactive emails and I'm always up for a challenge.
Wish me luck!
